
Alrighty, it took me a few years, but I finally cut into my gorgeous Nani Iro double gauze...and it turned into a skirt! Inspiredby my newly organized studio space (read: fabric displayed in open shelves, organized by color!), and the fact that a sweet little stitching studio opened up nearby, I decided it was finally time to get a little instruction for pattern-reading. I'm a completely self-taught sewist. My dad showed me how to sew a straight seam and backstitch when I was a kid, but no one ever told me how to use a pattern properly. I'm not sure how this happened, since my dad made me some dresses when I was little and I know he was using patterns, though I suspect that he was just winging it as I have been all these years. I mean, do people really cut out all those notches? Do they really transfer all of the markings onto the pattern? Do they really cut with the grain? Um, apparently they do. Here are some things I learned:
- After you cut your pattern, fold back the paper to the mark you need to transfer and use a disappearing pen to make the mark (on the wrong side of the fabric!). Maybe this all seems really obvious, but I never really considered how to transfer markings without literally going through the paper. Using this technique, transferring darts was a breeze; I just folded the paper back little by little, making two lines of dots that converged at the point marked on the pattern. Then the darts were pinned by matching the dots up as the fabric was folded (so it was important to mark the dots for each side of the dart in the same horizontal line).
- Use pins. Just do it. It's a pain, they are annoying, but just do it. My instructor had us pin the patterns before cutting fabric and this was probably a lot better than my "stick whatever semi-heavy object it nearest to you on the paper and hope that it doesn't shift while cutting" method.
-Use your cranium before you stick pins into pieces you are preparing to sew together so that they are facing the right direction you'll be sewing in. This took about 1 billionth of an extra second's worth of thought and was really, really worth it.
- I'm not ready to admit that this is a lesson learned, because I'll probably still not do it, but making a muslin isn't a bad idea. I didn't technically make one for this project, but I did decide to make a lining for the skirt...and then the lining turned out to be a muslin and we took the seams in at the hips a bit. Maybe the lesson needs to be to make a lining for every skirt?

The zipper went in all lovey-dovey, and I opted to not create the yoke or placket or whatever for the waist. I just sewed everything with right sides together, then turned the lining and sewed a top stitch to keep it down. I'm good at topstitching, so this is a good solution for me; if you hate topstitching, don't do it!

For the hem, I used the ribbon method from the skirt I made for Bean a few weeks ago. It makes a nice, clean edge and I like hunting through my boxes of ribbons to see what works. I believe this ribbon was from a gift from my mother-in-law (she knows how I save all of this stuff!)


 And in the interim, when I have to be lying down, I am happily involved in the fourth book of the
  I covered some buttons which was very fun and a little addicting. You get a little kit that comes with a simple tool to make the covered buttons. It's kind of like the potato chip phenomenon, you can't make just one. I don't think this project calls for seven buttons, but I couldn't help myself! Extras will be dealt with in an appropriately crafty fashion.
 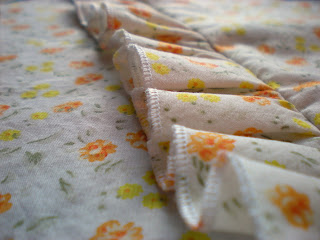 I also secured my ruffle (I'm using only the one ruffle on the princess seams) to my shirt. More importantly, I USED MY SERGER! That's right, that wonderful machine that I have owned for (dare I admit it) over two years now and haven't used yet. Well, I did try to use it once. I'm a big believer in the no-first-project-is-too-big-too-attempt and therefore I decided to break my serger in making a t-shirt. Out of knit fabric. Had I ever worked with knits before? Did it really matter because could anyone have convinced me not to try knits for my first serging project? Long story short: major failure; serger gathered dust (and the occasional pissy sideways glance from moi) while covered in knit t-shirt fabric for a few years. But I bought
  Here's what I got and I decided to try my hand at my first
 I'm really happy with the paint colors (just stuff in the basement that I've had from other projects) and how well the grey goes with the yellow interior. I think this may be my new favorite color combination.
 Such a very tiny amount that maybe it just looks sloppy rather than intentional, but I figure there's going to be plenty of wear and tear going on with a soon-to-be-toddler in the house so sooner or later it'll look weathered.
 This is my first jelly roll project and oh. my. god. When I bought the thing I felt a little bad like I was cheating or something. Now that I'm using it, I definitely feel like I'm cheating and I HEART IT. The only downside that I can so far see is that there was an abundance of little


