Tuesday, May 15, 2012

Mama Makes Mollie Makes


I'm assuming you've met Mollie Makes already?  The magazine has been around for a year, and I think I've been a subscriber since the third issue.  I love everything about it:  the projects, the obsession with felt that rivals my own, the giftie you get with every issue, the craving for tea and biscuits I have whilst reading it  as well as the proclivity I have for using words like "whilst" whilst leafing through it.  It comes wrapped in plastic with a piece of paper that covers the magazine so that it looks very generic and not unlike what I imagine porn magazines do to help their costumers retain some discretion.  And so, each month, I imagine my postal carrier's curiosity piqued and I've come to think of my Mollie Makes arrival as my monthly craft porn.

So I have a bunch of these magazines (which says a lot - - I don't do magazines because of how they tempt my inner hoarding demon) and every month I swear I'm going to make a project and I never get around to it.  This month, I decided that I'd try to complete at least one thing from the magazine each month and here's my first entry.  This little dolly worked up in an afternoon while I was home caring for my sick kid.  She was such a good patient, a new stuffie was in order.  I used purple for the dress, since that is Bean's favorite color, and left the eye color choice up to her...hence the purple eyes.  The pattern doesn't call for the little laces, but I stuck them on to give Bean something to practice tying. 

The directions were easy to follow, although I got a bit tripped up attaching the head to the body.  I needed to attach the front head to the front of the body and the back head to the back of the body (to give two pieces) which sounds obvious, but for some reason I thought the directions were telling me to sew both body pieces to just the front part of the head; so it involved a slight bit of muttering and one use of the seam ripper, but otherwise went together quite simply.  The construction is incredibly sturdy, and I even learned what a triple stitch is and from now on will use it for all of my stuffie seaming.


Sunday, April 8, 2012

I can't say that I made everything (such as these incredible mice in Mollie Makes) I planned to for the Easter basket this year, but I did manage to finish this cute little bunny from Fuzzy Mitten. He was easy to knit up, though stuffing the fact required a bit of finesse to make the shape just right. Or maybe I'm obsessive. This pattern comes with all kinds of cute outfits that you can knit. I just made the jacket before I ran out of time, but I'll be making the dress at some point; there's also a vest and a hoodie, so I'd encourage you to grab this pattern;) I'll be posting the details about the yarns I used over on Ravelry if you want to find me there (kdmade).
Because of my ongoing paranoia about chemicals going into my family, we purchased an egg dyeing kit from Whole Foods again this year. Again I boiled the eggs before reading the instructions and realizing that you are supposed to cook them in the dye, and again shook my fist to the heavens in frustration. Last year, I just used the dyes cold anyway and the color didn't really take. This year, I made the dyes with boiling water and only used 500 mls of water instead of the 750 they recommend. I just took the cooked eggs out of the fridge and we made sure to supervise Bean as she used spoons to get the eggs in and out of the colors and they worked great. The yellows don't really get too bright, but the pinks and greens are fabulous. The splotchiness in the photo isn't really on the eggs (that's just Hipstamatic being artsy); the colors also dyed fairly evenly. We'll definitely be doing this again next year, though I will remember to boil my eggs in the dye and I'll be saving pantyhose to try out this super cool decorating technique. Oh, who am I kidding, I'll be buying pantyhose to do it, who the heck wears pantyhose anymore?!

Saturday, March 24, 2012

Kokedama


Thanks to an ingenious birthday gift (xoxo, A!) I had a happy evening recently at a how-to class for Kokedama. I'd stumbled upon these amazing string gardens over at Pinterest (oh how I love thee, you fantastic-ly gigantic time-suck) and without even seeing my pin, Mr. Man decided to send me to a class. You know you've hit the jackpot when your partner knows you'll flip for something before he's actually seen you flip for it.


Of course I fell in love with these little gardens because of their simply beauty. I consider it a mere bonus that you can hang them from the ceiling if you want, though I think lots of people are drawn to them for that reason. But imagine my surprise, dear reader, when I learned that the plants are wrapped in moss before you tie them up with string. I mean, come on, this was a craft meant for me, right?

I made two hanging ones at the workshop (not pictured in this post) but I think I'm actually going to avoid hanging them. I learned that traditionally they are placed on little dishes, and I do love the way they look sitting around the house. The above Kokedama are daffodil and grape hyacinth bulbs which I bought in two pots, separated the bulbs out and wrapped them up in little groupings.

I can't wait 'till these guys bloom.
I experimented with an orchid because I like to live dangerously and also the orchids at my garden center are going out of bloom and so they are 50% off. I also like to live cheaply.
And this is a scented geranium which smells much less like cat pee than normal geraniums do. Also, it's super pretty all wrapped up.
The materials for these guys are easy to find at a good garden supply stores, though I'm not sure about where to get sheet moss. Well, I am sure where to get it on the internet (here) but I'm not sure that garden centers carry living moss. You can't use the preserved moss because I'm told it will get funky as it ages (and you keep it moist) and also, what the heck do they do to moss to preserve it? It freaks me out, so lets agree to stop using it. I, of course, simply went to my stash of sheet moss that I harvested when we moved from our last house; if you don't move with a box full of dried sheet moss, you're clearly doing something wrong.

I took my class at City Planter and here's a good tutorial that's pretty close to the method I learned. Now, go get your Kokedama on!

Sunday, March 4, 2012

Another skirt, in size: me.

Alrighty, it took me a few years, but I finally cut into my gorgeous Nani Iro double gauze...and it turned into a skirt! Inspiredby my newly organized studio space (read: fabric displayed in open shelves, organized by color!), and the fact that a sweet little stitching studio opened up nearby, I decided it was finally time to get a little instruction for pattern-reading. I'm a completely self-taught sewist. My dad showed me how to sew a straight seam and backstitch when I was a kid, but no one ever told me how to use a pattern properly. I'm not sure how this happened, since my dad made me some dresses when I was little and I know he was using patterns, though I suspect that he was just winging it as I have been all these years. I mean, do people really cut out all those notches? Do they really transfer all of the markings onto the pattern? Do they really cut with the grain? Um, apparently they do. Here are some things I learned:

- After you cut your pattern, fold back the paper to the mark you need to transfer and use a disappearing pen to make the mark (on the wrong side of the fabric!). Maybe this all seems really obvious, but I never really considered how to transfer markings without literally going through the paper. Using this technique, transferring darts was a breeze; I just folded the paper back little by little, making two lines of dots that converged at the point marked on the pattern. Then the darts were pinned by matching the dots up as the fabric was folded (so it was important to mark the dots for each side of the dart in the same horizontal line).

- Use pins. Just do it. It's a pain, they are annoying, but just do it. My instructor had us pin the patterns before cutting fabric and this was probably a lot better than my "stick whatever semi-heavy object it nearest to you on the paper and hope that it doesn't shift while cutting" method.

-Use your cranium before you stick pins into pieces you are preparing to sew together so that they are facing the right direction you'll be sewing in. This took about 1 billionth of an extra second's worth of thought and was really, really worth it.

- I'm not ready to admit that this is a lesson learned, because I'll probably still not do it, but making a muslin isn't a bad idea. I didn't technically make one for this project, but I did decide to make a lining for the skirt...and then the lining turned out to be a muslin and we took the seams in at the hips a bit. Maybe the lesson needs to be to make a lining for every skirt?


The zipper went in all lovey-dovey, and I opted to not create the yoke or placket or whatever for the waist. I just sewed everything with right sides together, then turned the lining and sewed a top stitch to keep it down. I'm good at topstitching, so this is a good solution for me; if you hate topstitching, don't do it!

For the hem, I used the ribbon method from the skirt I made for Bean a few weeks ago. It makes a nice, clean edge and I like hunting through my boxes of ribbons to see what works. I believe this ribbon was from a gift from my mother-in-law (she knows how I save all of this stuff!)

Monday, February 20, 2012

A skirt.

While making a run to the fabric store during my recent semi-annual quilting day (All day! With quilters who know 100% more than I do! And door prizes!!), I of course had to buy a sweet kid print along with my brown fabric for my quilt binding. It whispered, "Make me into a skirt," when I saw it in the shop. It didn't hurt that it had chicken-like birds on it; I'm kind of a sucker for poultry.

This was a one-nap skirt, meaning it took me under 2 hours to make it and it was so simple I could do it without much brain power (I make it a rule to turn my brain off during nap time, it's really what's best for everyone.) I found a simple pattern here (I. Love. Oliver & S.) and pulled a ribbon from my voluminous stash...please refer to my comments on craft hoarding in the previous post. I think you should know that this skirt involves cutting fabric from selvedge to selvedge, meaning you just fold in half and cut it to the length that you want the skirt to be (plus 2 inches for seam allowance). It's truly no muss/no fuss, which is a beautiful thing when you are working whilst brain-dead.

This is definitely going to be made up in lots of different prints throughout the various stages of her toddler-hood. And as you can see here, it's particularly good for wearing while giving tune-ups to your rocking horse.

Hello, Sunshine!

Well, that was a long hiatus. It turns out that toddlers are a bigger timesuck than Facebook and Pinterest stuck together and multiplied by a factor of 8 billion. Who knew? Add this to the long list of things they don't tell you before you have a baby (this list would include such gems as: you will most likely poop while birthing and toddlers don't know to lean over while puking so be ready to do a massive hair wash in the middle of the night when the stomach virus hits). Oops, did I just mention poop AND puke in the first paragraph of my resurrection post? They also don't tell you that you will become more obsessed with bodily functions than you ever thought possible. It is what it is, folks.

Enough about that, let's get to the crafting. In the recent months, enough has been happening that I now deem worthy to share, hence, I'm going to try to revive ye olde blog(e). I've been slowly getting back to making things, and I mean slooooowly getting back to it. First there was the responsibility of keeping a child alive and happy that kept me from creating, but because we didn't think that was enough of a challenge, we also decided to move in the first year of her life. Hahahahahaha! Haha. ha. This meant, of course, completely packing up my craft room, a task which I couldn't have managed without my friend/real estate agent coming over and throwing stuff randomly (!) into about a billion boxes. I'm not kidding when I say a billion, either. OK, maybe it was more like a million, but all I'm saying is that the movers actually started laughing at me midway through the move when I kept directing them to bring box after box to the craft room in the new house. Finally, after schlepping his 788th box of beads up a flight of stairs, one of the guys said "No, you don't," when I told him that I wanted the 789th brought to the craft room. I went upstairs to see what he meant and found a maze of stacked boxes taller than me...my very own hoarding reality show.

It took over a year to tackle it. And some tears. And a chunk of change. And a patient, patient man who was willing to give me a whole room to myself, walk past stacks of boxes of glitter and buttons and fabric for a year, deal with my intermittent meltdowns when I lost it because I hadn't made anything in a hundred years and couldn't even find anything if I'd tried (most common quote that started these rants: "I can't find the [expletive deleted] hot glue gun!"), and then, after all that, help me walk through planning, shopping, and putting together a functional room. It's almost there now. Not quite finished enough to photograph, but it's functional and it's beautiful and it keeps me sane.

So!

A quilt. This is my Particular Sadness of Lemon Cake quilt. Have you read it? I likedbutnotloved it, but while I was reading that book I couldn't get enough of the cover art. I kind of flipped out a little over the colors and declared that I would make a quilt top in those same colors. It's a super-simple nine patch, inspired by this quilt here. We took a trip to Lancaster to see a friend, and in between visiting farm stands and gorging ourselves on fresh ice cream, we scoured the fabric stores with book in hand.
This is my first quilt that I sent out to be quilted. What I'm really trying to say is that this is the first quilt I've ever made that was big enough to fit an adult body, and therefore it terrified me to try to quilt it by myself on my little machine. I actually tried and failed, so hey, a least I gave it a shot. But I wanted a finished quilt more than I wanted a dead quilt and a nasty drinking habit, so I sent it out. I love the little circles because they are kind of egg-like (slightly ovoid) and pick up well on the egg/bird theme going on in some of the prints. I also like that I didn't have to do it and I feel blessed to know that there is a woman near where I live who thinks having an industrial-sized quilting machine in her dining room is more important than a table and chairs. So now that I've figured out how to have someone else quilt my tops, I think I'll finally get around to having the baby's quilt finished (she's 2.5, in case you were keeping score.)
I chose to stick one of those little flim strip bits that are so popular right now (for good reason!) down the back of the quilt. It turns out that it makes it very hard to decide which side to look at.


Thursday, August 19, 2010

This you need to know about.

This is a post about marzipan. I love marzipan. I love it plain, covered in dark chocolate, and on cake (I make a kick-ass lemon cake that I cover with marzipan, if I do say so myself). There are many regrets I have about my former marriage, but perhaps one of the worst is that I let my caterer convince me that I couldn't have marzipan on my wedding cake because it was August. A decade later and I'm still bummed I didn't get that marzipan wedding cake (never mind the failed marriage, it's the lost opportunity of cake and marzipan that I'm really mourning now.)

This summer we visited my parents' old stomping grounds, Astoria NY. Hidden there, in its tiny, original storefront that's been in operation for longer than my Dad's been alive is La Guli's Bakery. They make marzipan. It looks like this: And this: The peaches have little chocolate pits. The figs look like figs. There was also a pear, an apple, and a cherry but I ate them so quickly I didn't get to photograph them. Oh, and they have the best spumoni water ice in the whole, wide world. And they still use baker's twine, pulled from those overhanging metal thingees, to wrap their boxes.

Here's to food as art, businesses that last because they are so damn good, and holding fast to beautiful traditions like bakery boxes strung together with red and white cotton twine.

Sunday, July 25, 2010

I've finally knit for Bean.


Elsie Cardi
Originally uploaded by kdmade

You'd think I would have at least knit her a hat, but no. I'm a bad knitting mama. But I finally found a pattern I love, that knit up in only a few days (hello?! Knitting baby sweaters makes me feel like a knitting superhero), and will be perfect for when we all start school in the Fall. Also, I'm a sucker for raglan sleeves. And patterns with no seams to bind.

I used Knitpick's organic worsted cotton and it knit up like. a. dream. Such a fantastic drape, much softer than I thought it would be. Lovely, lovely, lovely.

I chose not to do the crochet trim even though I was planning on doing it in a contrasting color. I just finished knitting and felt it was perfectly sweet the way it was.

These are some faboo vintage buttons I scored somewhere.
I put it on her this afternoon and she smiled and smiled. I think she understands "handmade".

Sunday, July 18, 2010

Does this make me a hacker?


Altoid tin ipod speakers
Originally uploaded by kdmade
I think I might have pulled off my first hack.

We have half of our belongings in storage since our house is on the market, including our CD collection. It's not such a big deal because I have almost everything on my ipod, but the speakers for the ipod live in the bedroom. It's not a huge speaker set and could totally be moved, but when you are living in a house that is on the market, moving anything is not advisable since, at any moment, you may have to move it back for a showing. Also, we are headed for our annual trip to Maine in a few weeks and I wanted to try to find a way to play some music in the car.

Enter the altoid tin ipod speakers. I found this tutorial and thought that little old techno-idiot me could pull of a stunt that was advertised as a "10 minute" project that was so simple a "monkey could do it". Well, 4 hours and a few choice words later, and I'm happy to say that this monkey has herself some portable ipod speakers.

Dear Andrew was quick to point out that I made the project more complicated than it was originally intended to be which must, of course, account for the extra 3 hours and 50 minutes I took to complete it. Well, that and my level of expertise with electronics is best summed up by the fact that installing one of those little snake thingees to wrap around and control all of the cords for my computer makes me feel like I've accomplished a huge technological feat. I didn't use earbud style earphones so getting the speakers out was a little more tricky than it needed to be. I used one big saffron tin instead of two altoid tins because I thought it would be cool to be able to store my ipod in there as well. Also, there was a wire connecting the two speakers and I didn't want to have to cut through any more wires that absolutely necessary. Let's just say I was a bit shaky on the whole putting-the-wires-back-together part of the project. I mounted the speakers onto a piece of really thick cardboard that was a pain in the freaking arse to cut through and then found a cool picture from an old calendar (yes, there is a reason why I save all of my cool, old calendars!) to cover the masonite/speaker mess.The speakers were hot-glued to the masonite, the masonite was hot-glued into the tin, the card covering was stuck into place with glue dots and Bob's your uncle, we have speakers!

I did have to cut the wire that runs into the ipod so that I could get it through the back of the tin . Splicing it back was no biggie, except I had no idea what they meant by using a lighter to melt the plastic after twisting the wires back together. The only plastic I could think of was the casing for the wire and I couldn't think of any reason why I would want to melt that. Just wrapping the wires wasn't reliably working though. At one point I actually got it to work, glued it all together, and then found it wasn't working anymore. In the end, I realized that there was a plastic fibery part in each the wires (along with the metal parts of the wire) and I took a lighter to that. That did the trick and I had sound!

I don't know if these are going to be loud enough for a car ride, but we'll test that out shortly. In the meantime, they are totally great for around the house and I now have a pretty place to store my ipod!

Saturday, July 17, 2010

Quilt Along Progress!


Quilt Along!
Originally uploaded by kdmade
OK, technically I'm a week behind here. I blame it on the heat. I've decided that, in the new house, I'm going to put the craft room on the second floor and our guests can roast their bippies off on the third floor while I happily work in the relative cool of the second floor. But in this house, I'm stuck and dear lord it's hot up there...only an idiot would add to that heat by turning on an iron. Ahem.

I actually have two more of the patchwork sides done for this quilt so I need to do two more and then sew on the next round of white strips to be caught up. Despite the fact that the heat is showing no signs of letting up, I think I might be able to crank it out tomorrow and then be up up to speed. Good thing, because I hate being behind (yes I was THAT kid who turned everything in on time)!

I'm trying to keep with the random nature of the quilt by pulling my pieces from the basket, but I'm not sure it's a perfect solution. A lot of the squares stuck together after I'd cut and stacked them because I'm not sure I mixed them all up well enough. I'm getting scared that I'm going to end up with 25 peices in the same pattern at the very end, but we'll see.

If I don't melt finishing up this week's work, maybe more pictures tomorrow!

Wednesday, July 7, 2010

Gathering Moss


Gathering Moss
Originally uploaded by kdmade
After waking up at 5 am this morning (house-selling stress) I decided to a) make myself a caramel latte*, and
b) pack up my moss in preparation for our move.

OK, maybe I'm a little crazy but how do I know if the new owners will love the moss or if they, like the previous owner before us would take drastic measures to destroy it ("I just spray it with bleach!" he said, generously handing over the pesticide sprayer he regularly filled with bleach to get the job done). That said, there are no new owners yet, just potential buyers who are snooping through our house and the fact of the matter is that some folks just don't get that moss-covered brick is a good thing, not a neglected shade garden. So our realtor (who is also our friend) gently suggested we do a little yard work this weekend since we have, in this insane heat, recently given up many of our plants for dead. She said nothing of the mossy walkway, but I decided that that's exactly what she was referring to. I mean, I was going to take the moss anyway!

So that is how I ended up at 5:30 in the morning, in my nightshirt and leggings with a caramel latte in hand, gently scraping up the moss with a spackling knife. In this picture you can see part of the walkway that I've de-mossed. I left some in some places (I mean, for pete's sake, I couldn't take all the woodsy-gnomey charm out of the garden) and the walkway actually curves around at the top so there was a lot of moss to be harvested.

In my moss class I was told that I should lay the moss out on some sort of screen or something with a fan blowing up underneath it to try to dry it out and allow it to go dormant (that's how they ship it all over), but we have a showing tomorrow night and I can't see a realtor trying to explain away a basement full of moss and fans. It was pretty dry anyway, thanks to the insaneinthemembrane heat that is killing everything green right now, so I put it into a box, stacked moss-side to moss-side (I gathered enough moss to fill a copy paper box!) and put it in the basement. We'll see what the movers think when I hand them a box that says "moss! live plants!" all over it.

*my caramel latte involves this stuff. I'm not trying to be overly dramatic or anything, but it's kind-of given me reason to live when the house selling stress really gets to me.

and, p.s., I finally figured out how to post to my blog from Flickr. I'm not sure what else to say about that, except that I'm feeling quite techno-savvy right now (it doesn't take much).

Thursday, June 24, 2010

I'm a Moss Maven.

No one ever told me what Date Night would turn into when you had a kid. Come to think of it, I never considered asking because every night is Date Night when you are childless; it's only when you are suddenly responsible for a little person's life that you look up one day, see your partner scraping poo off a diaper into the toilet and think "oh, hey. I remember you...you're kind of cute, want to go out?" only to fall asleep 10 minutes later just because the baby finally went down. A year into our new roles as parents and we're finally realizing that baby-free time is OK. It helps that we have two eager grandparents who want nothing more than to stare at Bean all night so really, I don't know what took us so long.

Enter: the Moss Date.
I like moss. A lot. In our current house we have a fantastic shade garden with a lovely brick path that is covered in moss. When we bought the house, the previous owner told us that it got slippery and so every once in a while he (sit down for this one) sprayed bleach on the moss to kill it. He was generous enough to leave us his bleach-spraying device, even. After promptly throwing the sprayer out, we sat back and watched the moss take over, carpeting the walk and making the space feel positively enchanted. I had no idea how to cultivate moss, but any time I'd be digging around in the shade garden, I'd toss any dislodged mossy bits onto new ground, stomp on it a few times and leave it be. Turns out, this plus a little water is about all you have to do to grow moss.

So when Moss Acres hosted a moss workshop in nearby Radnor, I said to Andrew: I'd like to go to that and can we drop off Bean at her grandparents and have dinner and call it a date? And that is how we ended up getting a coffee, learning about moss, and having grilled cheese at a diner on our (I think) second official date since Bean arrived.

And here is what I am thinking about now...

- There are 22,000 species of moss. I'd like to know about at least 10...seems like a good start.

- I need to gather some of the moss from this house and move it with us to our next house. I also need to start sourcing old bricks so that I can recreate our little path. And I need to take the rock that I moved into the garden which is now covered with moss with me to the new house. Sorry new homeowners, you can't have my mossy rock.

- I need to put a moss green roof on the chicken coop in the new house. I don't know how I'm going to accomplish this, but I really, really need to do it.

- I need to spread the word that sphagnum moss / peat moss is bad bad bad because it is being overharvested and is destroying ecosystems.

That is all. Go moss!

Sunday, June 20, 2010

Stray dogs and center squares.

We found a little beagle on the side of the road very near to our house on Thursday night. It had a collar with a rabies tag, but nothing else. It took a long time to track down the owner...we called the vet from the tag who didn't want to give us the address but called the owner on our behalf. They reached the wife who was out of town who couldn't get a hold of her husband who was with the kids at the park. Arg. The dog (Celie) was very sweet but very eager to explore her surroundings and without a leash, I spent a good half-hour hunched over, keeping her held back by her collar. We got her back to our house and borrowed a leash from a neighbor and waited outside, but not before Celie got a little freaked, strained against the leash and succeeded in pulling my back out of whack. You may remember that I threw my back out a few months ago while needlepointing. Well, at least this time I was being slightly more athletic, but the result is just as crappy: I'm OK lying down or standing up, but sitting really hurts.
Nevermind, I have a quilt along to keep up with! I've been going at it in short bursts since I can't sit for too long, but so far I have all of my strips sewn, a little less than half of them ironed, and the center of my quilt all made up. Pretty, pretty!And in the interim, when I have to be lying down, I am happily involved in the fourth book of the Number 1 Ladies' Detective Agency. I'd started the series a while back, put it down and then picked it back up again when I heard they'd done an HBO series based on the book. I think these are just about the sweetest stories ever (perfect summer reads) and although I think Jill Scott and the woman playing Mma Makutsi are doing a wonderful job, there is a lot lost in translation. I also cannot figure out why new characters have been made and plots changed significantly (like, entire mysteries are solved to be something completely different) but I'm trying to be open minded about it. I think that's what Mma Ramotswe would want at least! Anyway, I have lots to do while laying down, even if I can't figure out how to rig my sewing machine so that I can operate it whilst horizontal.

Saturday, June 19, 2010

Simple tools, scary tools.

Here's the latest progress on my JJ blouse...
I covered some buttons which was very fun and a little addicting. You get a little kit that comes with a simple tool to make the covered buttons. It's kind of like the potato chip phenomenon, you can't make just one. I don't think this project calls for seven buttons, but I couldn't help myself! Extras will be dealt with in an appropriately crafty fashion.
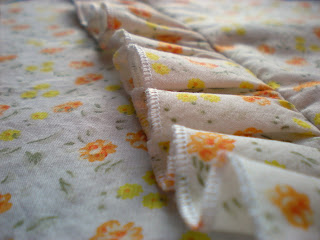
I also secured my ruffle (I'm using only the one ruffle on the princess seams) to my shirt. More importantly, I USED MY SERGER! That's right, that wonderful machine that I have owned for (dare I admit it) over two years now and haven't used yet. Well, I did try to use it once. I'm a big believer in the no-first-project-is-too-big-too-attempt and therefore I decided to break my serger in making a t-shirt. Out of knit fabric. Had I ever worked with knits before? Did it really matter because could anyone have convinced me not to try knits for my first serging project? Long story short: major failure; serger gathered dust (and the occasional pissy sideways glance from moi) while covered in knit t-shirt fabric for a few years. But I bought a book, mustered up some confidence and found the rolled edge stitch on my cotton fabric to be very easy. Yay!

I'm continuing with my french seams, though it seemed a little odd to make them over the ruffle. May be a little too bulky in the end, but we'll see. For now, I'm still loving the project, though the impending sleeve and collar instructions are scaring me. Never mind, I still have my quilt along project to distract me...

Wednesday, June 16, 2010

A blouse.

We are full of buying and selling house stress over here. I don't want to bore the blogosphere with my story of our real estate adventure, but let's just say that our weekend involved open house preparations and an overflowing toilet. Thankfully we survived and celebrated on Saturday with lunch at one of our favorite little spots in a quaint little shopping district nearby. As luck would have it, Andrew parked the car right in front of the quaint little fabric shoppe (it's quaint, you need that extra "pe") and I decided that since I was still smarting from our plumbing and vacuuming extravaganza, I needed a pretty piece of fabric to make it all better...his fault for parking in front of the fabric store!
Here's what I got and I decided to try my hand at my first Burda Style pattern, the JJ Blouse. It has a lot of ruffles, which I might pare down to just one. I like this interpretation.

This is the second downloaded pattern I've used (the pinafore was the first) and I rather like the cutting and pasting of the pattern pieces. I figure I'm going to have to trace the pieces anyway if I'm using an already-printed pattern...and frankly, without a light board, I find tracing to be a pain.
So I've started sewing but need to wait for a nap before I get photos in progress. Let's just say it involves french seams, because that is my new favorite skill.

Thursday, June 10, 2010

WIPs

Finding a matching handle to the originals on my jewelry box is proving to be insanely difficult. I've looked through door hardware (too big), cabinet hardware (getting warmer), and miniature supplies (too tiny). I started searching for cabinet "hardware" or "knobs", but I do believe that I end up more in the size range I'm looking for (3") in the category "finger pulls". On a different note, who the heck names these things?!

OK, so here is the WIP that is the jewelry box. I'm really happy with the paint colors (just stuff in the basement that I've had from other projects) and how well the grey goes with the yellow interior. I think this may be my new favorite color combination.
I did a very wee little bit of distressing. Such a very tiny amount that maybe it just looks sloppy rather than intentional, but I figure there's going to be plenty of wear and tear going on with a soon-to-be-toddler in the house so sooner or later it'll look weathered.

And here's my week's work for the quilt along. This is my first jelly roll project and oh. my. god. When I bought the thing I felt a little bad like I was cheating or something. Now that I'm using it, I definitely feel like I'm cheating and I HEART IT. The only downside that I can so far see is that there was an abundance of little fuzzies that flew everywhere when I opened the roll. Next time, I'll bat it around outside a little before opening it up indoors. Otherwise? I did lots of ironing and cutting for my background fabric and then happily got to the jelly roll and lazily unwound it and chose my fabrics. Done and done. I should also note that I gave myself a three-inch burn along the back of my arm from my iron. I know, I know. What the frick was I doing with my iron to burn the back of my arm? The iron was behind me and when I yanked the plug out of the wall, my arm backed into it. We were leaving for a party as I did this (of course) and our host had to use hairbands to hold an ice pack on there for me. I don't want to get a scar, but if I do, I'm going to enjoy calling it my quilting battle scar.

And because I have quilts on the brain lately, here is a hand-quilted number that is making me crazy happy.

Monday, June 7, 2010

A pinafore.

Man, I want to make this in me-size.
I made up this little pinafore for Bean last night from a Heidi and Finn pattern. I'd seen a bunch of these pinafores at the Art Star Craft Bazaar a few weekends ago and wanted to make them up with my own fabric choices. I found a few patterns but liked this one because of the cute little pocket.
I used the same fabric as I did for the Easter bonnet. I made the pocket out of the contrasting lining fabric and I sewed the back flaps on in reverse so that the you get to see the pretty blue from behind. OK, that's not really why I did it...I just messed up because the wee one and her Dad left me alone in the house and I was feeling frenzied about finishing this before they got home. I didn't pay attention to the directions at that point and by the time I realized it, I was not feeling the seam-ripping vibes. I still think it's cute!

I did everything as instructed, except for the fact that I topstitched the entire piece at the end. This was super duper fun because once you have the whole thing sewn together, you basically have a moebius strip. I just started at the back and worked my way 'round until I came back to the starting point. Yay for the magic of moebius!

This pattern is going to get a lot of use. It's quick and easy (for last-minute gifts) and is simple enough to be personalized. I'm thinking of putting some appliques on future pinafores rather than a pocket. Also, I think the pinafore is nice enough on the inside to be considered reversible, so there's some creative potential in that.
Now I just need to rework this pattern to be grown-up size...somehow I think I'm going to encounter the same issue with all of the Heidi and Finn patterns I sew...

Sunday, June 6, 2010

A jewelry box.

Here's my latest project: redoing a childhood jewelry box. I say childhood not because I remember this particular box while growing up (neither can my Mother, for that matter), but because of what I found inside of it. These are the treasures of my childhood self...

A ribbon fish.This was made by a woman who owned Waverly gardens with her husband years and years ago. Local peeps will know that this is YEARS ago because the greenhouses are still standing, but the shop has been closed forever. My Dad was way into gardening when I was a kid and we spent many a weekend in the local nurseries. I'd wander around, picking up fallen flowers that I found all around. At Waverly gardens, the woman would use ribbons to make decorations like fish and flowers and they'd be stuck randomly into the plants. I loved that about Waverly gardens. One day I remember watching her for a while as she put this fish together. I don't think we spoke (possibly a language barrier because I don't ever remember speaking with her) but when she was finished the fish, she just gave it to me. I remember feeling very lucky to have one of those fish and especially lucky having seen this one go together. It's always been safely stowed away somewhere in my life.

A bag of my orthodontic rubber bands.
Sigh. Why were these things all named for kids doing karate? Who knows. All I remember is that I couldn't relate to karate and I hated those rubber bands...but the collecter in me DID like it when I moved onto the next stage and could get a different bag...


Various and sundry game pieces. Childhood gambling problem?


Little plastic figurines. I liked tiny things and I still do.

One of my charm bracelets. Just one. I have two necklaces full of charms somewhere. These are such an incredibly important part of my life in the 1980s. Why can't they bring these back? So much better than silly bandz.


A bunch of random jewelry, most of which doesn't bring back any memories. These three are very memorable. The green k always reminded me of an m&m and I liked anything with my initials on it. Also, it's a substantial weight and I remember wearing it and running it back and forth along the chain. The monkey was loved for his moveable appendages and the dancer was well loved because I was big into ballet...

...and...bras...(what the?)...I do remember cutting the fuzzy fabric to fit into that little heart-shaped trinket box.

A miniature music stand. I love this because it's handmade and unfinished. Someday I'll finish it when I start putting together Bean's dollhouse.


So the jewelry box looked pretty plain. The yellow drawer lining was in excellent shape so I decided to keep that. I chose this as my inspiration because I knew I had a bunch of no-voc paint in similar colors in the basement.


It's been sanded, primed, painted and scuffed a little to make it look slightly weathered. I'm not ready to show the finished product yet because I still need to find a replacement for a missing door handle (see first pic) and spray paint the ones I have...but I'll reveal soon.

made. by k.d.